New in our range: the beautiful Miyuki Tila beads. These flat, rectangular beads have 2 parallel threading holes and are ideal for beadwork. At Dreambeads Online Miyuki Tila beads are available in two sizes; Tila (5 x 5 mm) and Tila Half (5 x 2.3 mm). There is also a wide choice of beautiful colors for making beautiful patterns.
There are many ways to work with Miyuki Tila beads. We want to show you 2 jewelry pieces as inspiration and also how to make these sets yourself. Are you excited yet? We certainly are!
The perfect bracelet set.
We are going to start making bracelets. View here which steps to follow so that you can get started quickly yourself.
- Step 1 -
Start by choosing your favorite colors from this lovely collection. Are you going for a beautiful seasonal look by choosing warm colors in combination with mother-of-pearl and gold? Or do you prefer cool tones such as blue, grey and silver? The choice is yours! Do you need more color inspiration? Then take a look at Pinterest or choose one of these color combinations that we have put together for you.
- Step 2 -
Have you chosen your colors? Okay, then we'll move on to the stringing material. For this Tila bracelet set we use our 0.5 mm metal wire (A2347). Cut approx. 34 cm from the metal wire using cutting pliers (R182). This may seem a bit long, but because of the 2 threading holes in each bead, it is nice to work with extra length. Now fold the metal wire in half so that you can easily string your beads later.
- Step 3 -
Now place your beads in the desired order of approximately 12 cm long. This is best done on a flat and spacious surface where you have a good overview of what your bracelet will look like. A bead design board (R105) comes in handy for this.
- Step 4 -
Are you happy with the pattern? Then you can start stringing now! As the folded metal wire is already prepared you can string the beads easily on the double wire. Once you have stringed all the beads make sure you have about 2 cm of wire left on both sides to finish the bracelet.
- Step 5 -
Now string a crimp bead (Y124) over both wires at one end and follow up with a lobster clasp (X107). Then thread the two wires back through the crimp bead to create a loop that will secure the lobster clasp. Now squeeze the crimp bead with flat nose pliers (R180).
- Step 6 -
At the other end you repeat step 5 and exchange the lobster clasp with an (extension chain).
There you are! Your bracelet with Tila beads is done. Make as many as you want for a set.
… Or is it less is more? Whatever the question may be, the more the better because they are too much fun not to wear!
But we are not done yet. Do you also want to know how to make these fantastic earrings? Then read on here!
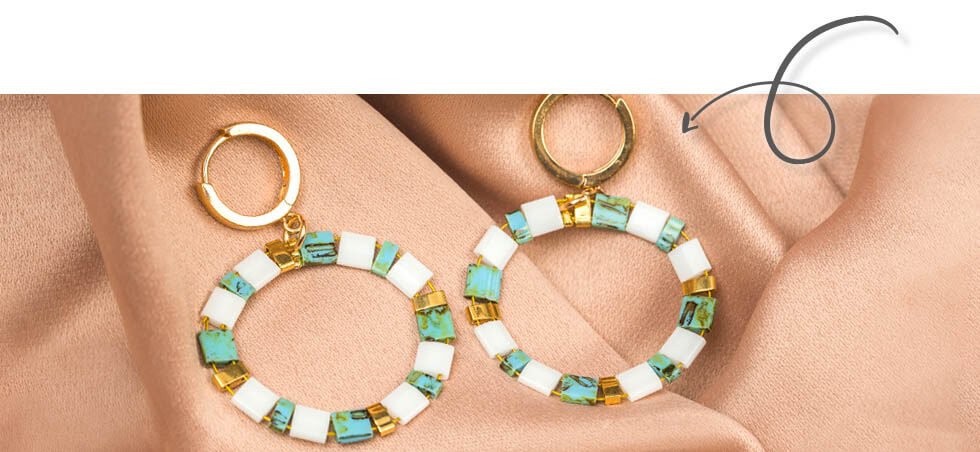
Special creoles earrings.
- Step 1 -
The first steps are almost the same as for the bracelet as described above. We start again by choosing trendy colors that you like. In the example we have used the following Tila beads:
- Step 2 -
For the earrings also use the 0.5 mm metal wire (A2347), cut approx. 25 cm and fold it in half. Then lay out your beads in the desired order for the required pattern and string them on the double wire.
- Step 3 -
Now string 2 crimp beads over the ends of the wire and then thread them through a few Tila beads to hide the wire nicely. As you thread the wire ends through the first and last bead, you automatically create the round shape.
- Step 4 -
Then squeeze the crimp beads and attach a jump ring (X207) in the middle. To this you can now attach an earring. Check out these item numbers for our earring suggestions: P306 or the Y2262.
To do: share your creations on social media with #dreambeadsonline