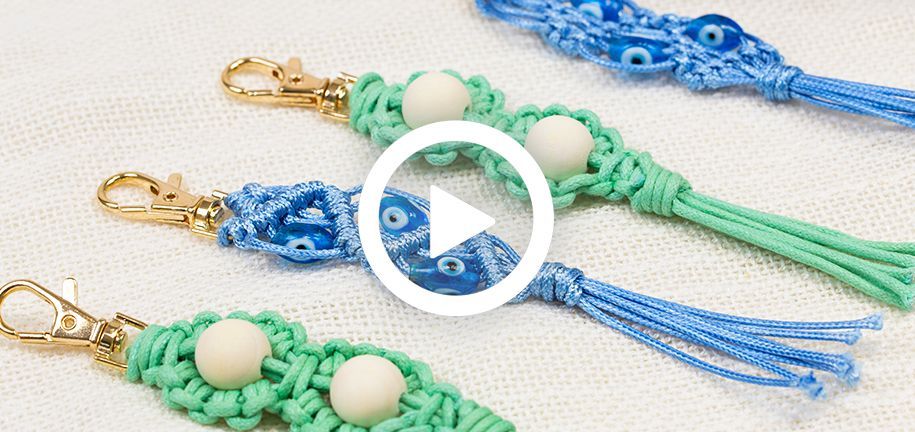
Knotting a key holder
With our DIY tutorials making your own macrame key holder will become even easier! Check out two videos on this blog, each with an example of a macrame key holder. We will also tell you which findings you need and which macrame knot patterns are suitable. With our detailed instructions you will succeed in making a beautiful macrame key holder!
Making a key holder is a nice do-it-yourself project. You are creative and using different knots will reward you with a great end result. Would you like to make a macrame key holder? Then read on quickly and get started!
Macrame knot pattern
There are countless macrame knot patterns available online. And everything is possible. Actually, it all starts with mastering the most important basic knots. Once you can tie the basic knots yourself, decide on a pattern by combining one or more of these knots. Want to know all about the larks head knot and the square knot? Check out ourMacrame knots blog and learn the basic knots! und lernen Sie die Grundknoten!


Materials needed
What do you need to make a macrame key holder? We'll tell you which key holders go with which design. All findings - very practical - can also be found in our range.
Macrame Key holder #1:
Waxed polyester cord
Glass beads Evil Eye
Key holder
Macrame Key holder #2:
Waxed cotton cord
Natural wooden beads
Key holder
Instructions for macrame key holder #1
First unroll enough waxed polyester cord and cut off a piece of approx. 65 cm. Repeat this step two more times so that you have a total of three cords of about 65 cm in length. Secure the three cords to the key holder with a larks head knot. This is a simple basic macrame knot that is often used to attach a cord to an object.
Tip: You can fix the key ring to the table with adhesive tape so that it does not slip when knotting.
Now the knotting of the double half hitch begins. With this knot you have the choice of tying horizontally, vertically or diagonally. We have chosen a diagonal knot. This is tied in a zigzag through the knot pattern. In between, the Evil Eye glass beads are linked to create a beautiful overall picture.
When the double half hitch is completed, the key holder is finished off with a wrap knot. Cut about 45 cm of cord for this knot. Form a large loop and place it over the other cords. Then wrap the single cord around the other cords from top to bottom. Pass the cord through the loop and pull the other end of the cord out at the top.
Cut off the remaining cord ends and your macrame key holder with beads is complete!
Instructions for macrame keychain #2
Unroll the waxed cotton cord and cut two pieces of cord, each about 65 cm long. Now you attach the two cords to the key holder with a simple anchor knot (larks head knot).
To start knotting, unroll another piece of waxed cord and cut it to a length of about 120 cm. You now have enough cord to begin making the double half hitch knot and square knot. Follow the tutorial step by step and see how these knots together create a beautiful macrame knot pattern.
When knotting, we also add ed beautiful wooden bead. This gives the macrame key holder a very special effect! Of course you can also combine other beads with the key holder.
Done knotting? Then finish off the key holder with a wrap knot. Then cut off all remaining cord ends. Now this beautiful macrame key holder with wooden beads is finished!
Types of key holders
For making macrame key holders, we have different types of key holders which you can use. Discover our extensive range of key holders and start making your own macrame key holders! We have a nice selection of keyrings, keyrings with chains and special macrame key holders. These have an extra wide ring, suitable for wide macrame knot patterns.


Making your own key holder is fun! Would you like to know more about the production of key holders? Check out our other blogs and videos and discover how you can easily get started yourself.

