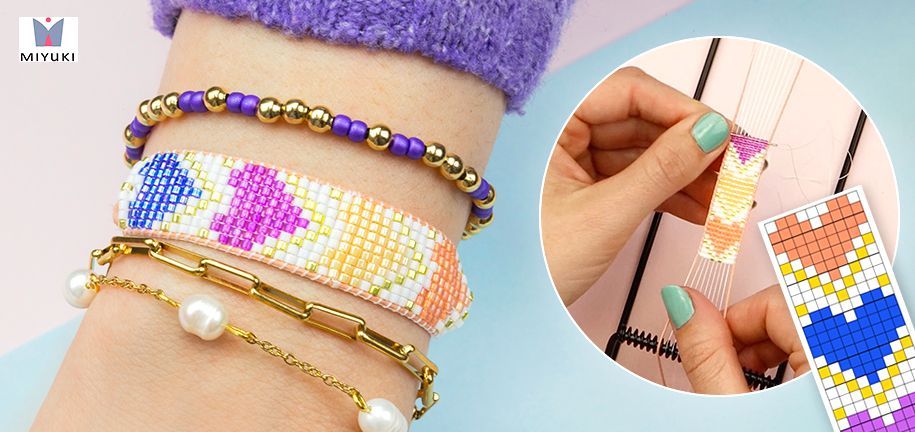
Would you like to learn how to make woven bead bracelets with Miyuki Delica beads? Now is the right moment to fully immerse yourself in the creative world of Miyuki beads, bead looms and weave patterns. We will explain everything you need to know and give you useful tips. Also, we will show you how to make a beautiful and tightly woven bead bracelet with vivid examples and how to finish it professionally (with DIY tutorial).
Tip: Download our heart weave pattern for FREE!


Materials needed
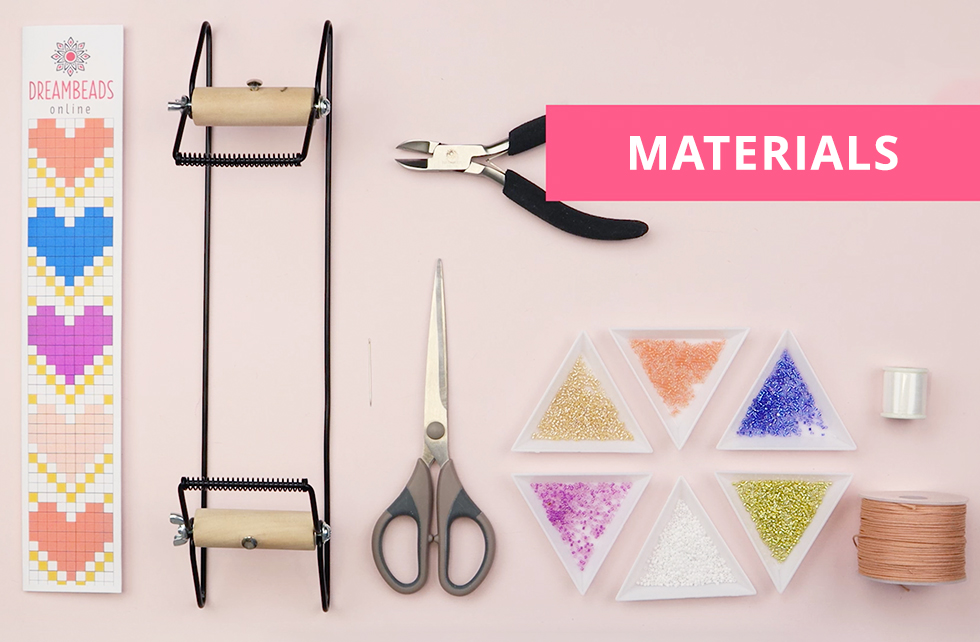
There are several ways to create and finish a woven bracelet. For this bracelet we are using a bead loom and we will finish the bracelet with a sliding knot. You will need the following materials:
Miyuki Delica beads
Japanese Miyuki Delica beads are most commonly used for the creation of woven bracelets. Miyuki Delica beads are 100% the same size and shape. Ideal for precision work such as making detailed woven bracelets.
Miyuki Delica beads are available in many colors and coatings. The size of these small beads is 11/0 and corresponds to approx. 2 mm bead diameter. Despite their small size, they have a bead hole size of 0.8 mm. Miyuki Delica beads can be easily threaded onto the matching Miyuki nylon thread. This thin but extraordinarily strong thread does not tear and is ideal for making woven bracelets.
Do you want to buy Miyuki Delica beads? At Dreambeads Online you will find a beautiful selection of Miyuki beads. Choose from a variety of basic colors or opt for a beautiful set of 5 colors carefully chosen by us.


Weave pattern
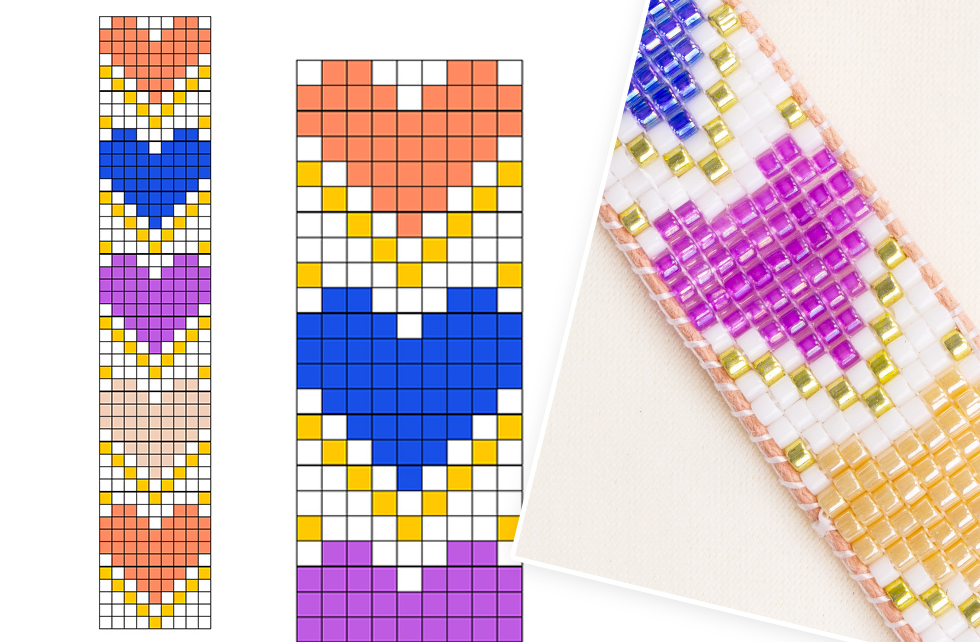
To make a woven bead bracelet you need a weave pattern. The pattern shows you exactly which beads in which color you have to thread in the correct order per row. The weave pattern we designed consists of colored hearts featured vertically one below the other. Very pretty! Of course, you can also come up with your own weave pattern or search for a weave pattern on the internet.
Tip: Save our weave pattern now and print it out.
Bead loom
Indispensable for making woven bead bracelets: a bead loom. The Beadsmith bead loom is the perfect tool for this and is available from Dreambeads Online. Do you already have a bead loom? Great, then we can start making woven bead bracelets right away!
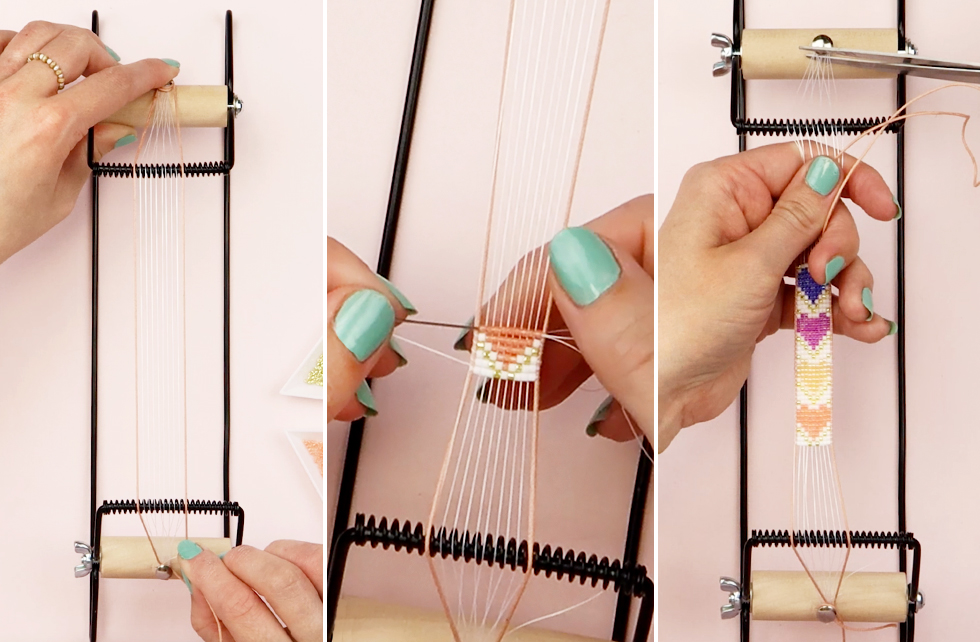
The first thing to do is to prepare the bead loom. Unwind a piece of Miyuki nylon thread and tie it to your bead loom with a double knot (on the silver button). Our weave pattern consists of 9 vertical rows. To set this up, add 9 strings of thread to the bead loom. Then secure the thread by passing it once around the silver button of the bead loom and tying a double knot.
Now for the waxed cord. Cut about 1 meter of waxed cord and add it to the bead loom in the same way as the Miyuki nylon thread. Pass the waxed cord along the outside of the Miyuki nylon threads and secure itm. Make sure that you have sufficient waxed cord left for the sliding knot.
Cut approx. 1 meter of Miyuki nylon thread and thread it through the eye of the needle. We now fasten this thread to the waxed cord attached on the left by tying a simple knot again. Once the Miyuki nylon thread is secured, you're ready to start weaving!


Miyuki bracelet weaving
Pass the thread underneath to the bottom right and start threading the Miyuki Delica beads. Follow the weaving pattern to see which colors to thread for Row 1. Spread the beads from below into the gaps between the taut Miyuki nylon threads and gently push them up. From the right hand side it is now possible to pass the nylon thread through the beads to the left hand side. Then pull the nylon thread tight so that the beads sit tight together.
Repeat the same steps for the other horizontal rows to quickly reveal the pattern.
Completing the Miyuki woven bead bracelet
Is your weave pattern complete? Just hold on a second - you're nearly there! Now it’s time to finish your bracelet beautifully with a macrame sliding knot.
After threading the last row of beads, tie a simple knot on the last bead threaded. Then pass the Miyuki nylon thread back through the last row of beads and cut the thread.
Unroll the waxed cord from the bead loom and cut the Miyuki nylon threads as long as possible. Now you begin to neatly sew up all the vertical Miyuki nylon threads. To do this, pass a Miyuki nylon thread through your needle and pass it through the last row of beads. Then cut the thread. Repeat this step with all the remaining Miyuki nylon threads.
The last step is to make a macrame sliding knot. Knot the remaining waxed cord on both sides of the bracelet. Cut a new piece of waxed cord approx. 60 cm long and start making the sliding knot. Apply some jewelry glue for extra strength. Allow the drying time and cut off the remaining cord. Now tie a knot at the respective ends of the waxed cord so that they cannot slip out of the sliding knot.
Video woven bead bracelet
Mission impossible? This practical DIY tutorial will show you in detail how to make a Miyuki woven bead bracelet using a bead loom. You will surely succeed now!
Making woven bead bracelets - something for you?
Weaving bead bracelets is not difficult. However, it requires accuracy and patience. Do you like precision work? And do you love working with small beads and creating a special color pattern? Then creating woven bead bracelets is for you!
Making Miyuki woven bead bracelets is an activity to be truly proud of. From designing a weave pattern to mastering the weaving technique to making a beautiful macrame sliding knot. It is not surprising that the weaving of bead bracelets in jewelry making is still immensely popular.
However, be careful... once you get started, you won't want anything else!


