3 Methods for attaching a lobster clasp
Finishing your jewelry beautifully is an important part of basic knowledge for making bracelets and necklaces. Jewelry findings such as lobster clasps, crimp covers and jump rings come in handy.
Are you just beginning to make jewelry and are not sure how to get started? We will show you 3 methods of how to attach a lobster clasp to your beading wire. With this knowledge you can easily get started making bracelet clasps as well as necklaces with a clasp. Discover the possibilities here and find out which of these methods suits you best.
The lobster clasp
In our range we offer lobster clasps in different sizes and colors and of course of excellent quality (stainless steel). Are you unsure about the suitable size of a lobster clasp? A lobster clasp of 11mm is a nice average size. Depending on your jewelry design, you can also choose a smaller or larger size lobster clasp in order to fit the whole picture.
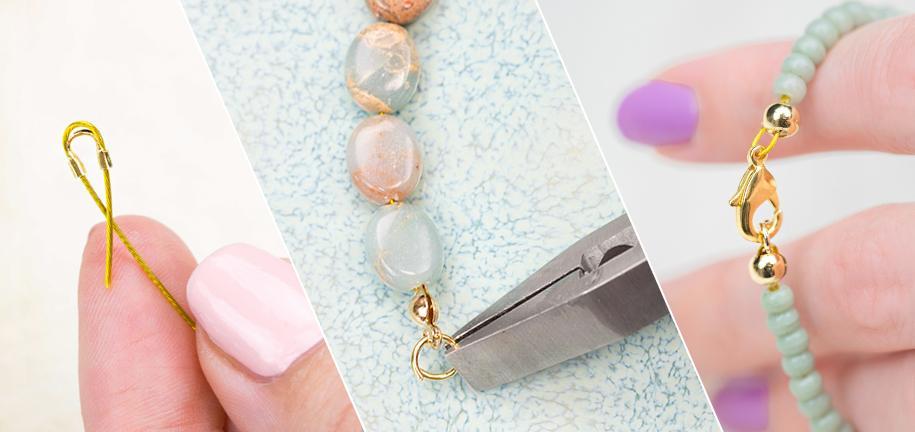
To learn how to attach this popular clasp to your handcrafted jewelry, we will show you different options with matching explanations. We will present three methods with these different jewelry findings:
1. Crimp beads and crimp covers
2. Bead tips
3. Wire protectors
Method 1 - Using crimp beads and crimp covers

Which materials will you need?
- Lobster clasp
- Crimp beads + crimp covers
- Jump rings
- Beading wire
- Side cutter
- Flat nose pliers
How to proceed:
Use a side cutter to cut a piece of beading wire to the desired length. Take into account an extra length of beading wire for the finish.
Now first string the crimp bead onto the beading wire, followed by the lobster clasp. Then thread the end of the beading wire back through the crimp bead to form a loop and pull it tight until the lobster clasp sits tightly secured on the beading wire. Use flat nose pliers to squeeze the crimp bead closed.
The lobster clasp is now attached to the beading wire, allowing you to start stringing the beads. String the first beads over the double beading wire and then cut the remainder so that the end is neatly hidden under your beads.
When you have completed stringing the beads, repeat the step from above, but replace the lobster clasp with a jump ring. Twist open the jump ring correctly so that it retains its shape nicely.
Our tip:
You can also use crimp covers. As the name suggests, these covers provide an elegant way to hide the crimp beads and cover any sharp edges. You place the crimp cover over the crimp bead and then gently squeeze it closed with flat nose pliers.
Method 2 - Using bead tips
Which materials will you need?
- Lobster clasp
- Bead tips
- Crimp beads
- Jump rings
- Beading wire
- Side cutter
- Flat nose pliers
How to proceed:
Use a side cutter to cut a piece of beading wire to the desired length. Take into account an extra length of beading wire for the finish.
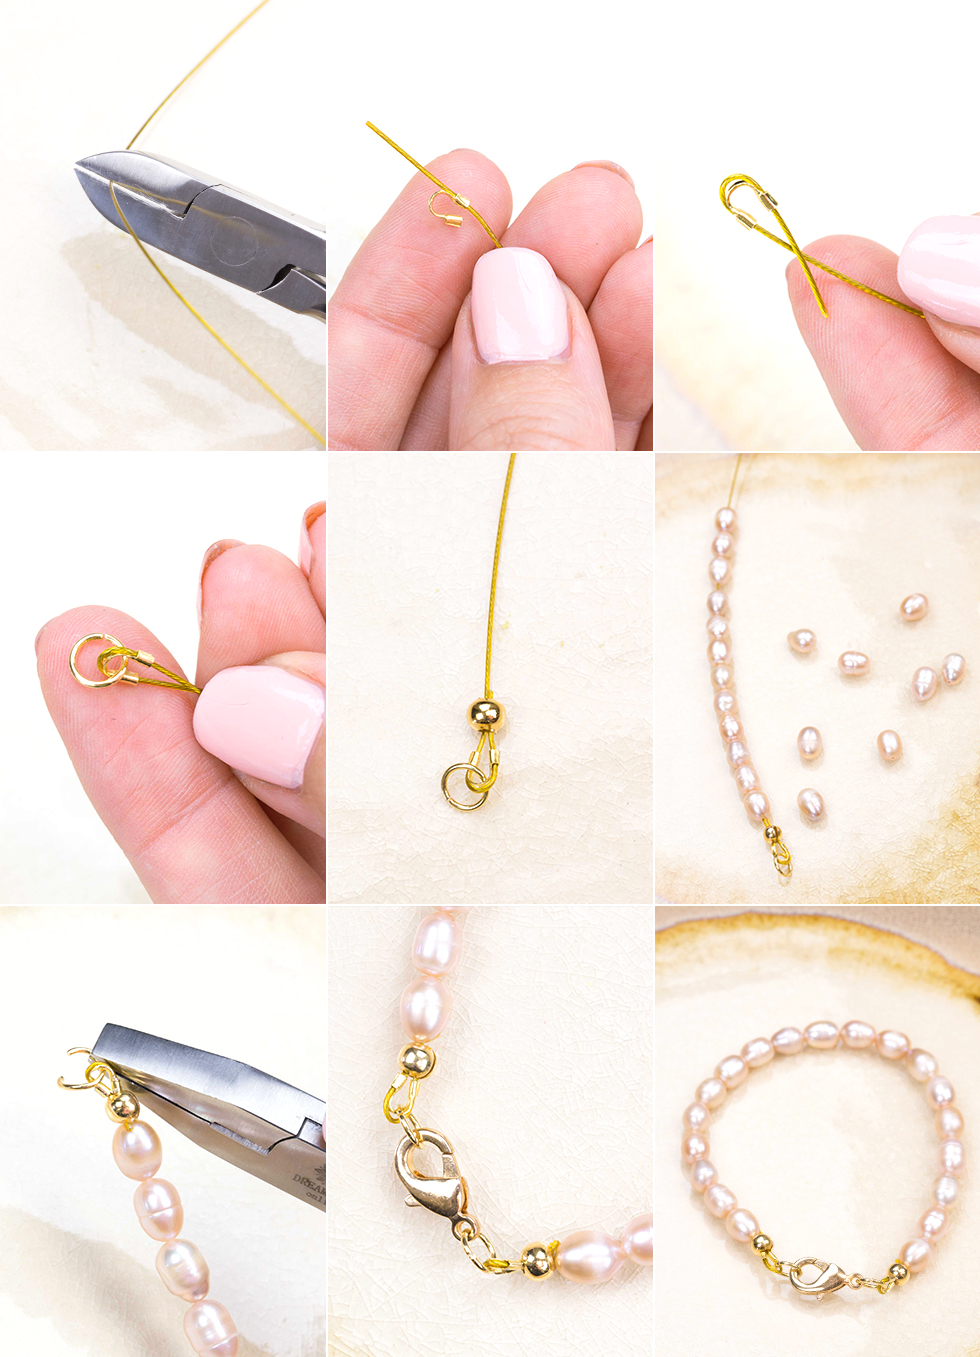
Start by stringing the bead tip onto the beading wire, followed by a crimp bead. Make sure that the opening of the bead tip faces the crimp bead, as it will be used to cover it. Now squeeze the crimp bead closed with flat nose pliers, so that it sits nicely secured on the beading wire. You can cut off the remaining end of beading wire directly next to the crimp bead.
Next you carefully close the bead tip over the crimp bead. Use flat nose pliers or try closing it with your fingers. If you use flat nose pliers, it is very important to close the bead tip very carefully. Squeezing it too hard will deform the bead tip and may even damage it. Later you will attach a jump ring to this bead tip for the clasp. As the bead tip is now attached to the beading wire you can start stringing the beads.
To finish the beading wire repeat the same steps as described above. String the bead tip onto the beading wire, followed by the crimp bead. Move this crimp bead as close as possible to the bead tip and squeeze the crimp bead closed. Try to avoid leaving too little space between your beads and the bead tip, otherwise the necklace or bracelet will not be flexible enough. You can now carefully close the bead tip over the flattened crimp bead.
Twist open a jump ring correctly and attach it to the bead tip, then twist the jump ring closed. Repeat this step with the other bead tip on the other end and attach a lobster clasp to the jump ring.
Method 3- Using wire protectors
Which materials will you need?
- Lobster clasp
- Wire protectors
- Crimp beads + crimp covers
- Jump rings
- Beading wire
- Side cutter
- Flat nose pliers
How to proceed:
Use a side cutter to cut a piece of beading wire to the desired length. Take into account an extra length of beading wire for the finish.
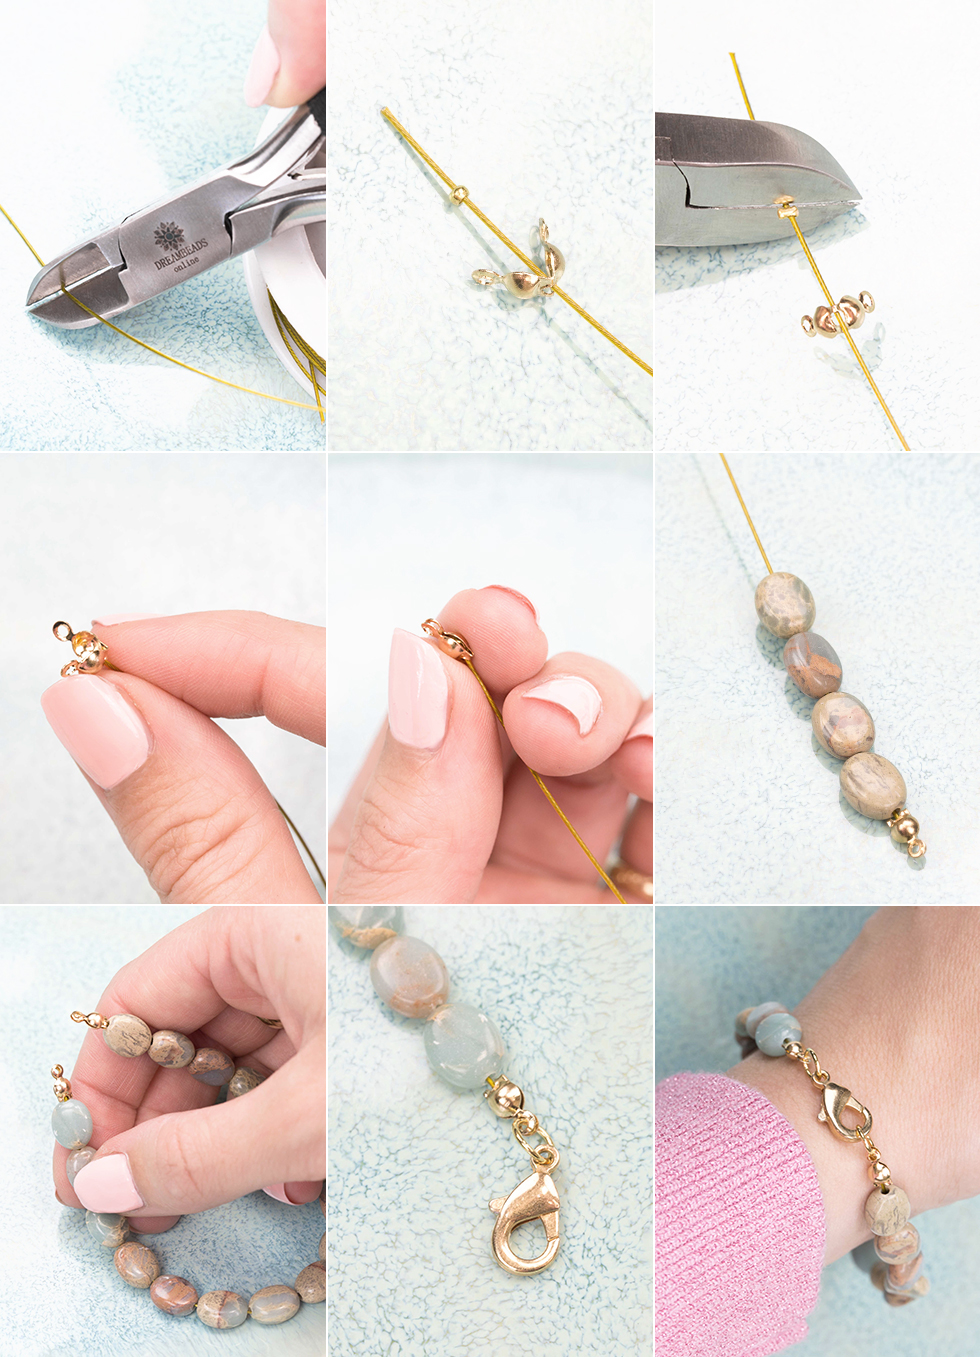
Thread the beading wire through the two openings of the wire protectors. As you have now created a kind of open loop, you can follow up by stringing a closed jump ring onto it. Next, thread a crimp bead onto your beading wire, push it up against the wire protector and squeeze it closed with flat nose pliers. You can choose to hide the crimp bead elegantly with a crimp cover.
Grab your beads, because it's time to start stringing them onto the beading wire. Once this is completed, we go on for a nice finish of the other end of the beading wire.
After stringing the last bead follow up with another crimp bead and thread the beading wire through the wire protector. As you can see, you have created another open loop to which you can attach a closed jump ring. This is the jump ring for attaching the lobster clasp.
Now double thread the beading wire through the crimp bead, making sure to pull the beading wire tight enough so that it sits nicely in place. Squeeze the crimp bead closed and cut the remaining beading wire close to the crimp bead with a side cutter.
Conclusion
So there are several methods available when finishing your beading wire. The best method for you depends on your own preference. Which one do you like best? Or which are the findings that you like to work with the most?
By using bead tips and wire protectors, your beading wire is protected and the finish looks professional. If you use a bead tip, you don't have to use a crimp cover, it spares you a couple of steps. However, maybe you don't find a bead tip very suitable for your jewelry design and you find a wire protector with a crimp cover more to your liking. By trying it out for yourself you will know what works best for you.
Get started
Well done! You have now learned how to attach a lobster clasp to your bracelet or necklace. This is a good base for making jewelry. You can of course replace the lobster clasp with another type of clasp such as a toggle clasp, a slide lock clasp or a spring clasp.
You would like to make jewelry but still need a little help? No problem, we are happy to help you! For practical tips and DIYs, take a look at our blogs. Do you want to make bracelets yourself? We have summarized all the necessary information in one overview. Read now all about making bracelets with practical examples and inspiration and get started yourself!